Clawd.bot Deployment Guide (Molt.bot): Build Your 7x24 Private AI Assistant
Clawd.bot (now rebranding as Molt.bot) is an open-source AI assistant that runs on your own hardware (Mac, Windows, Linux). It integrates with messaging apps you already use (WhatsApp, Telegram, Discord, Slack, Signal, iMessage, etc.), allowing you to send commands directly in the chat to get things done.
Step 1: Prepare Your Virtual Private Server (VPS)
Clawd.bot requires a 24/7 online Linux environment. For the best experience, we recommend using an international virtual server:
Recommendation 1: Ultra-Cheap Lightweight Server
512MB RAM | 1vCPU | 30GB SSD — Only $22.99/year
Recommendation 2: Budget Performance VPS
2 vCPU | 2 GB RAM | 26 GB SSD — Only $2.16/month
Step 2: Quick Installation
1. Log into your terminal and run the one-click script:
curl -fsSL https://molt.bot/install.sh | bash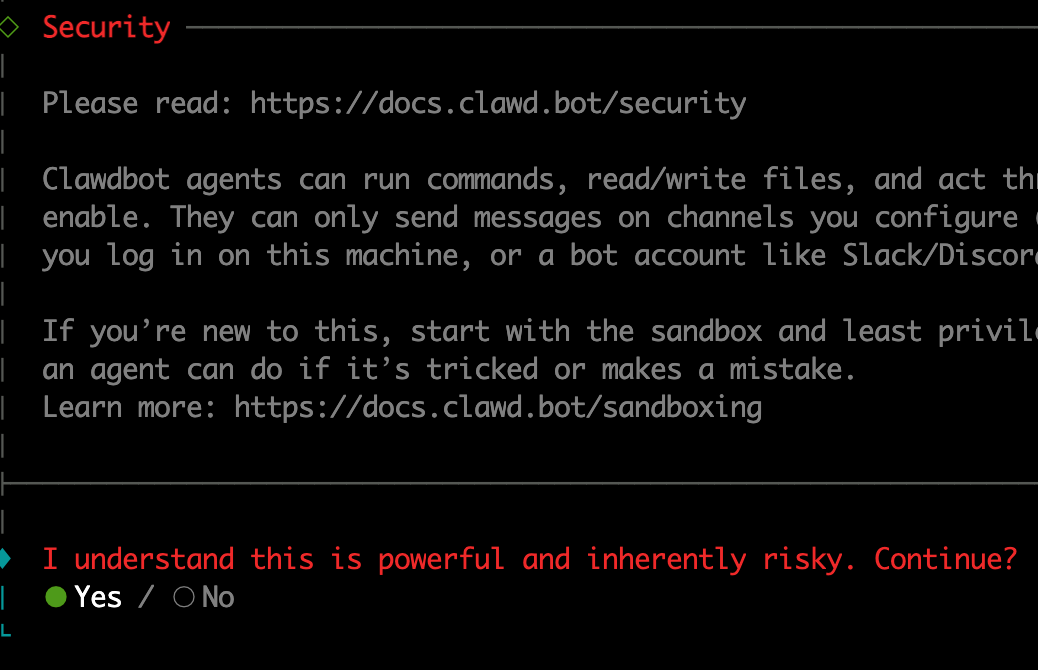
Follow the prompts: select Yes, and then choose QuickStart.
2. Model Selection: We recommend Qwen (Qwen Code). It is free, has high limits, and is excellent for coding and general assistant tasks.
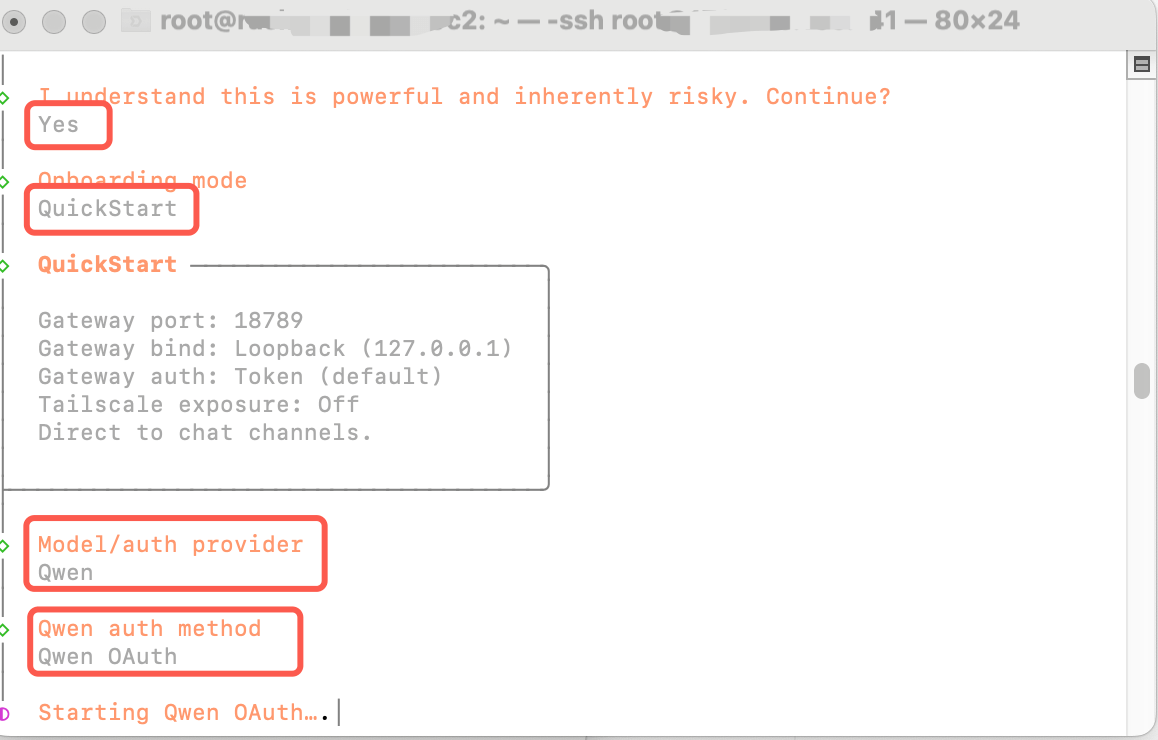
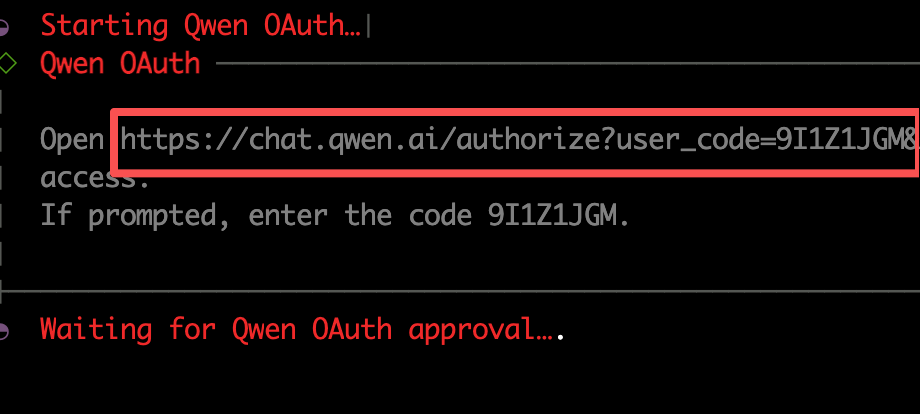
3. Authorize Qwen: The terminal will generate a URL. Open it in your browser and complete the login authorization.
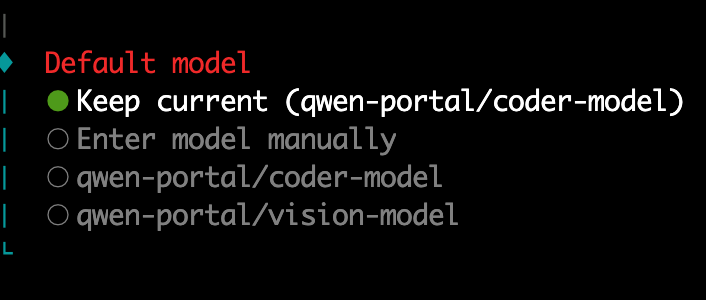
After a successful login, select the model.
Step 3: Connect Telegram Control
1. After selecting Telegram, the following configuration guide will appear:
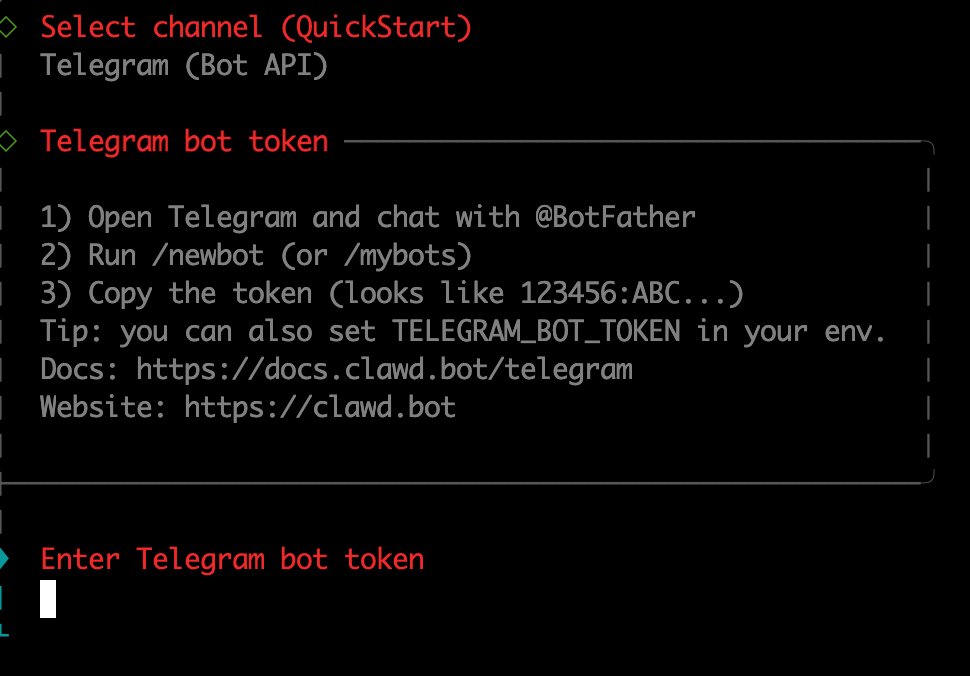
Open Telegram. Search for "@botfather". Send /newbot. Name your bot. Then copy the bot token back to your terminal.

2. Configure skills and hooks (Optional). You can skip this and add them later.
Step 4: Start the Service
1. Check if the service is running
Run the command in your terminal:
ss -lntp | grep 18789If there is output, the service has started successfully. If not, you may need to create a systemd service to run it.
2. Create the Service File
cat /etc/systemd/system/clawdbot.serviceFile Content:
[Unit]
Description=Clawdbot Gateway Service
After=network.target
Wants=network-online.target

[Service]
Type=simple
User=root
WorkingDirectory=/root
Environment="NODE_ENV=production"
Environment="PATH=/usr/local/sbin:/usr/local/bin:/usr/sbin:/usr/bin:/sbin:/bin"
ExecStart=/usr/bin/clawdbot gateway
Restart=always
RestartSec=10
StandardOutput=journal
StandardError=journal
SyslogIdentifier=clawdbot

[Install]
WantedBy=multi-user.target
After creating the file, start the service:
# 2. Reload systemd configuration
sudo systemctl daemon-reload

# 3. Start the service
sudo systemctl start clawdbot

# 4. Enable auto-start on boot
sudo systemctl enable clawdbot

# 5. Check status
sudo systemctl status clawdbot
Step 5: Telegram Pairing
Open Telegram, start a conversation with your new bot and send /start. (Click the link in the first red circle below to open your bot)
A pairing code will appear:
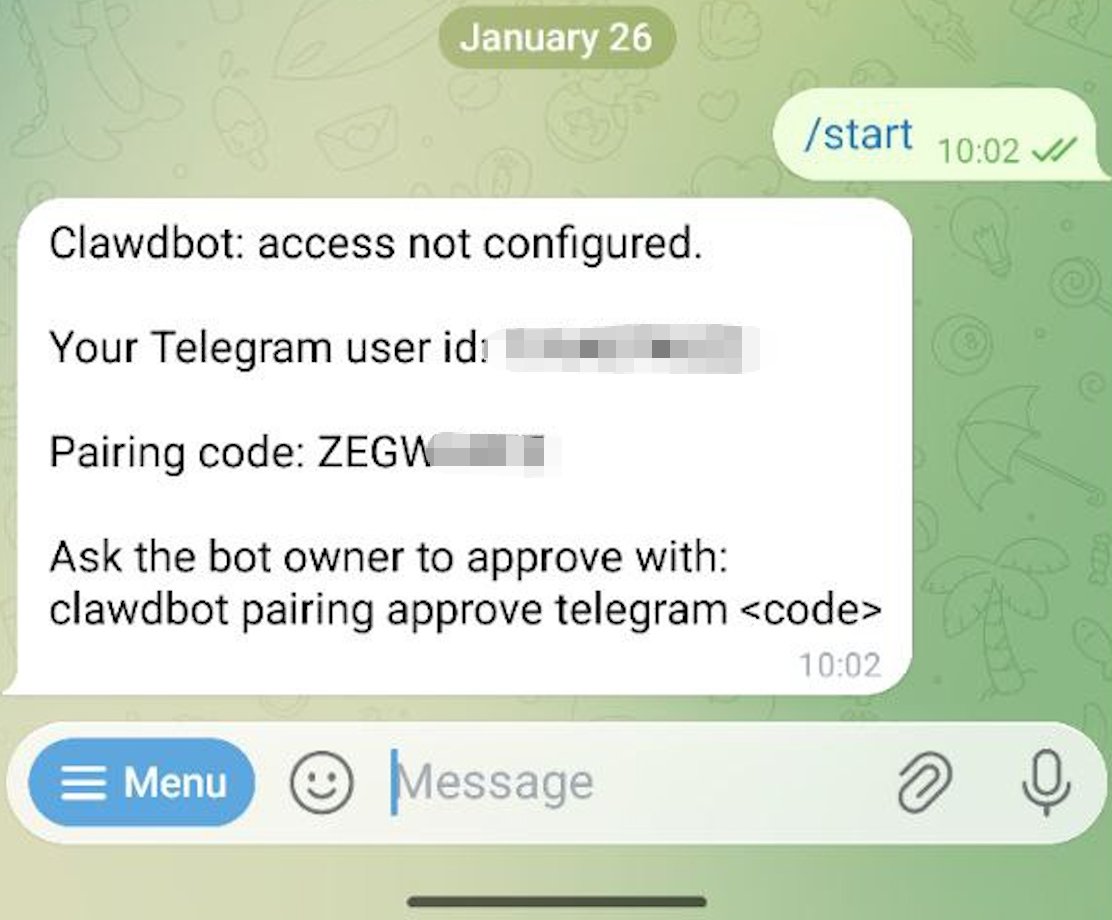
Go back to the server terminal and enter clawdbot pairing approve telegram + your code:
clawdbot pairing approve telegram [YOUR_CODE]command not found error, try restarting your terminal session.
Step 6: Usage
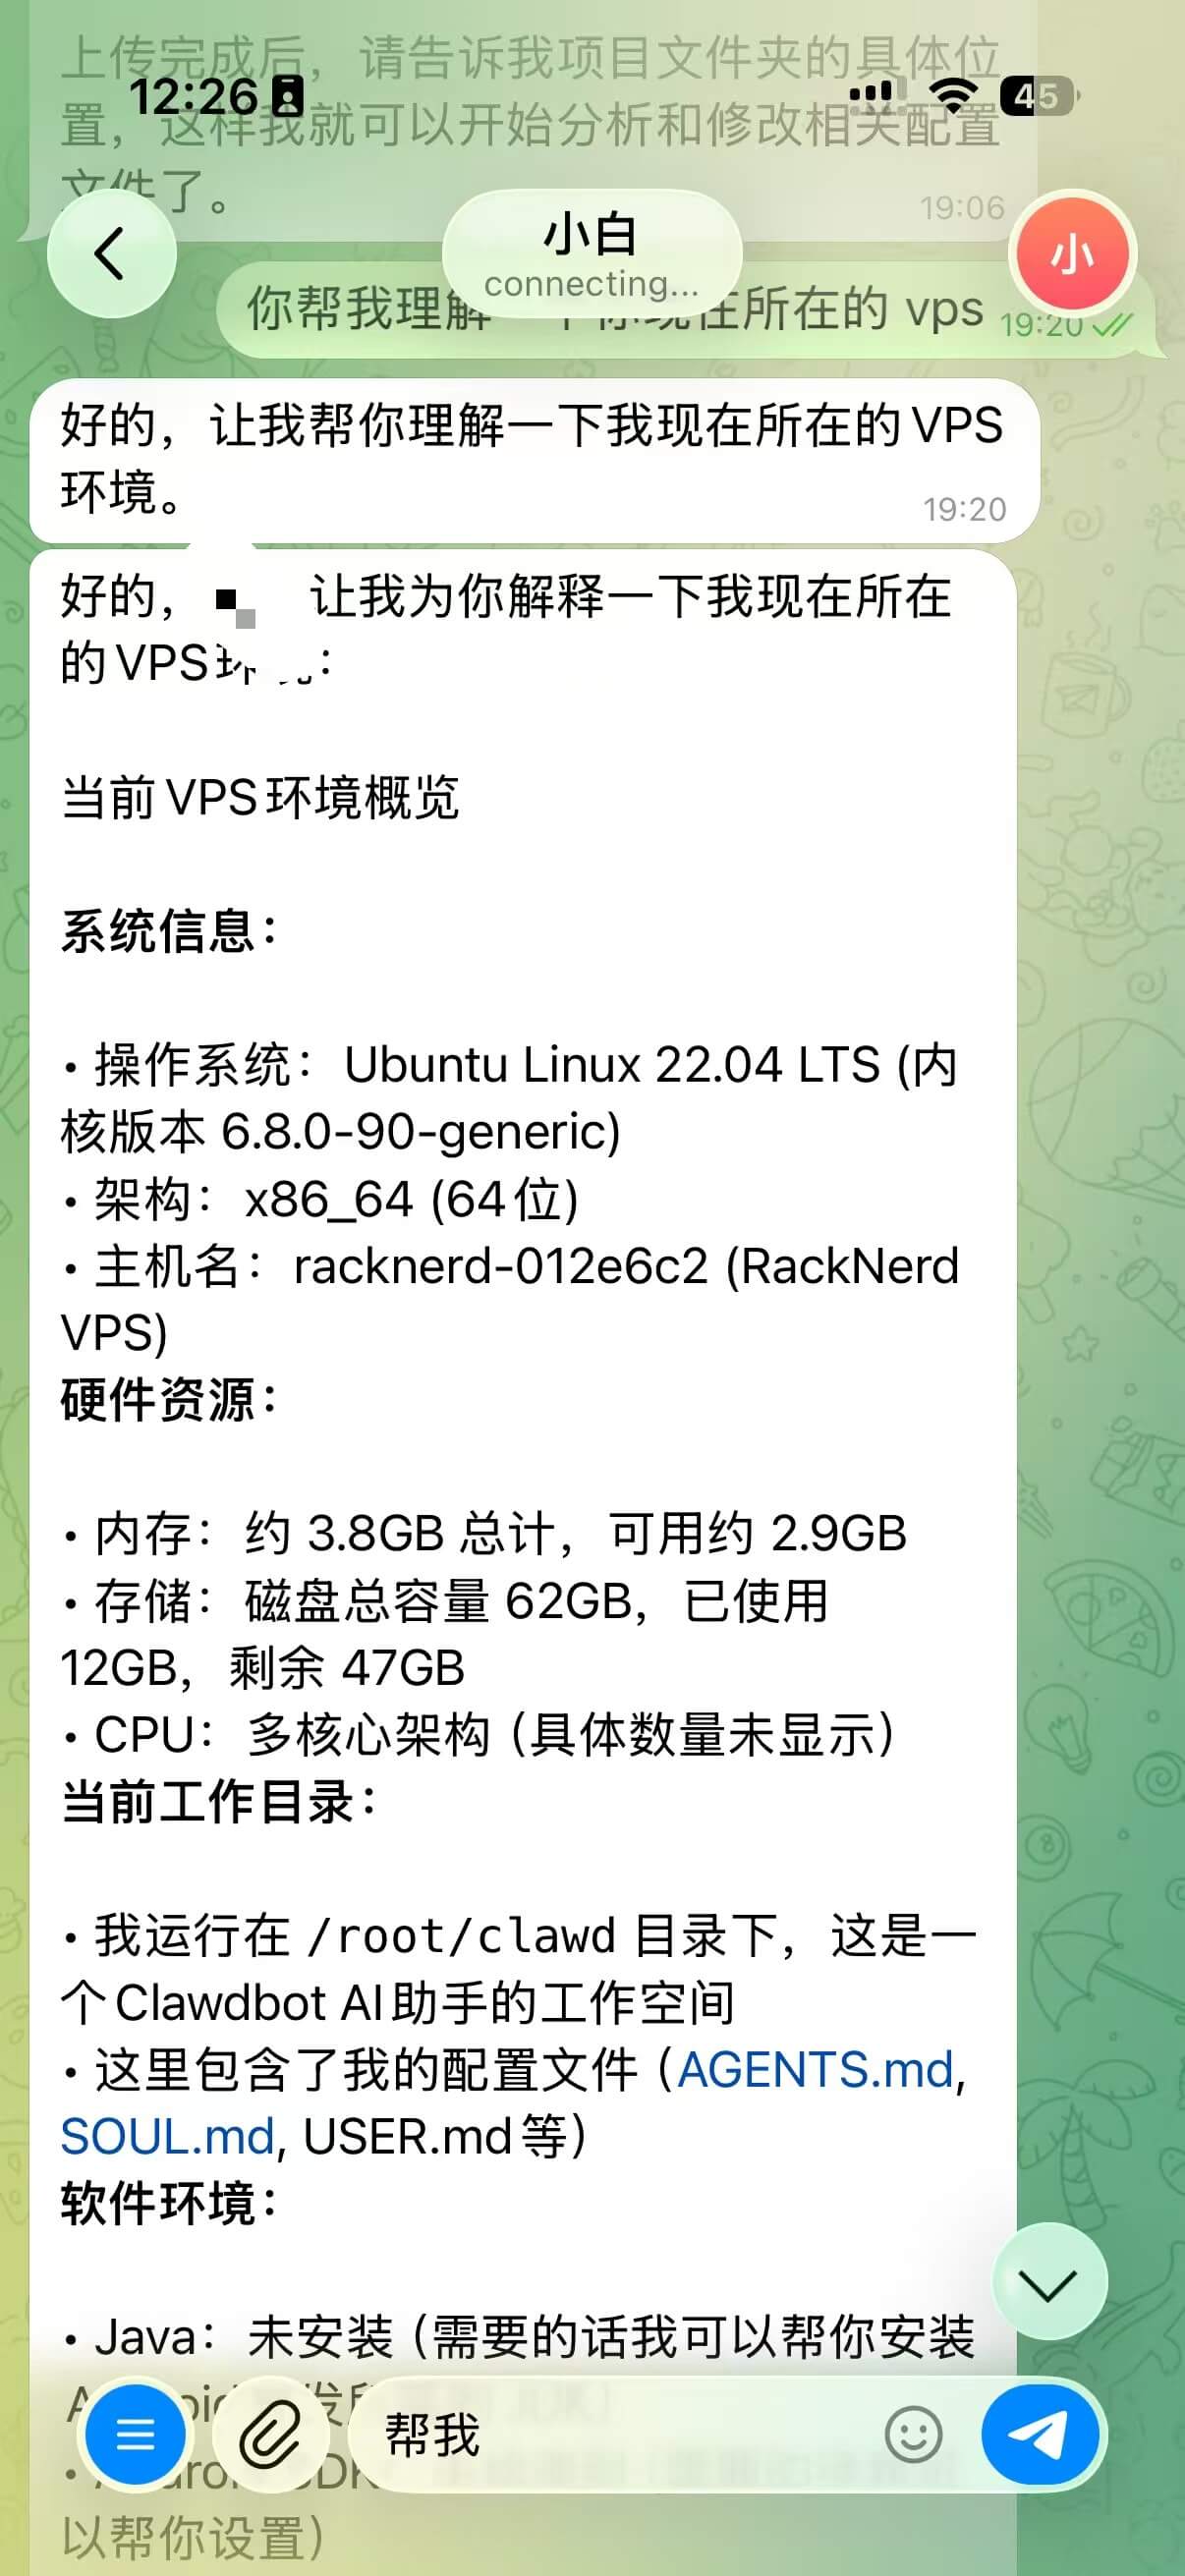
Your assistant is ready! You can now ask it to do anything.

Want the Experience Without the Setup?
I offer a complete "Managed Setup" service: including VPS procurement, environment config, model integration, and Telegram pairing. You just chat; I handle the tech.